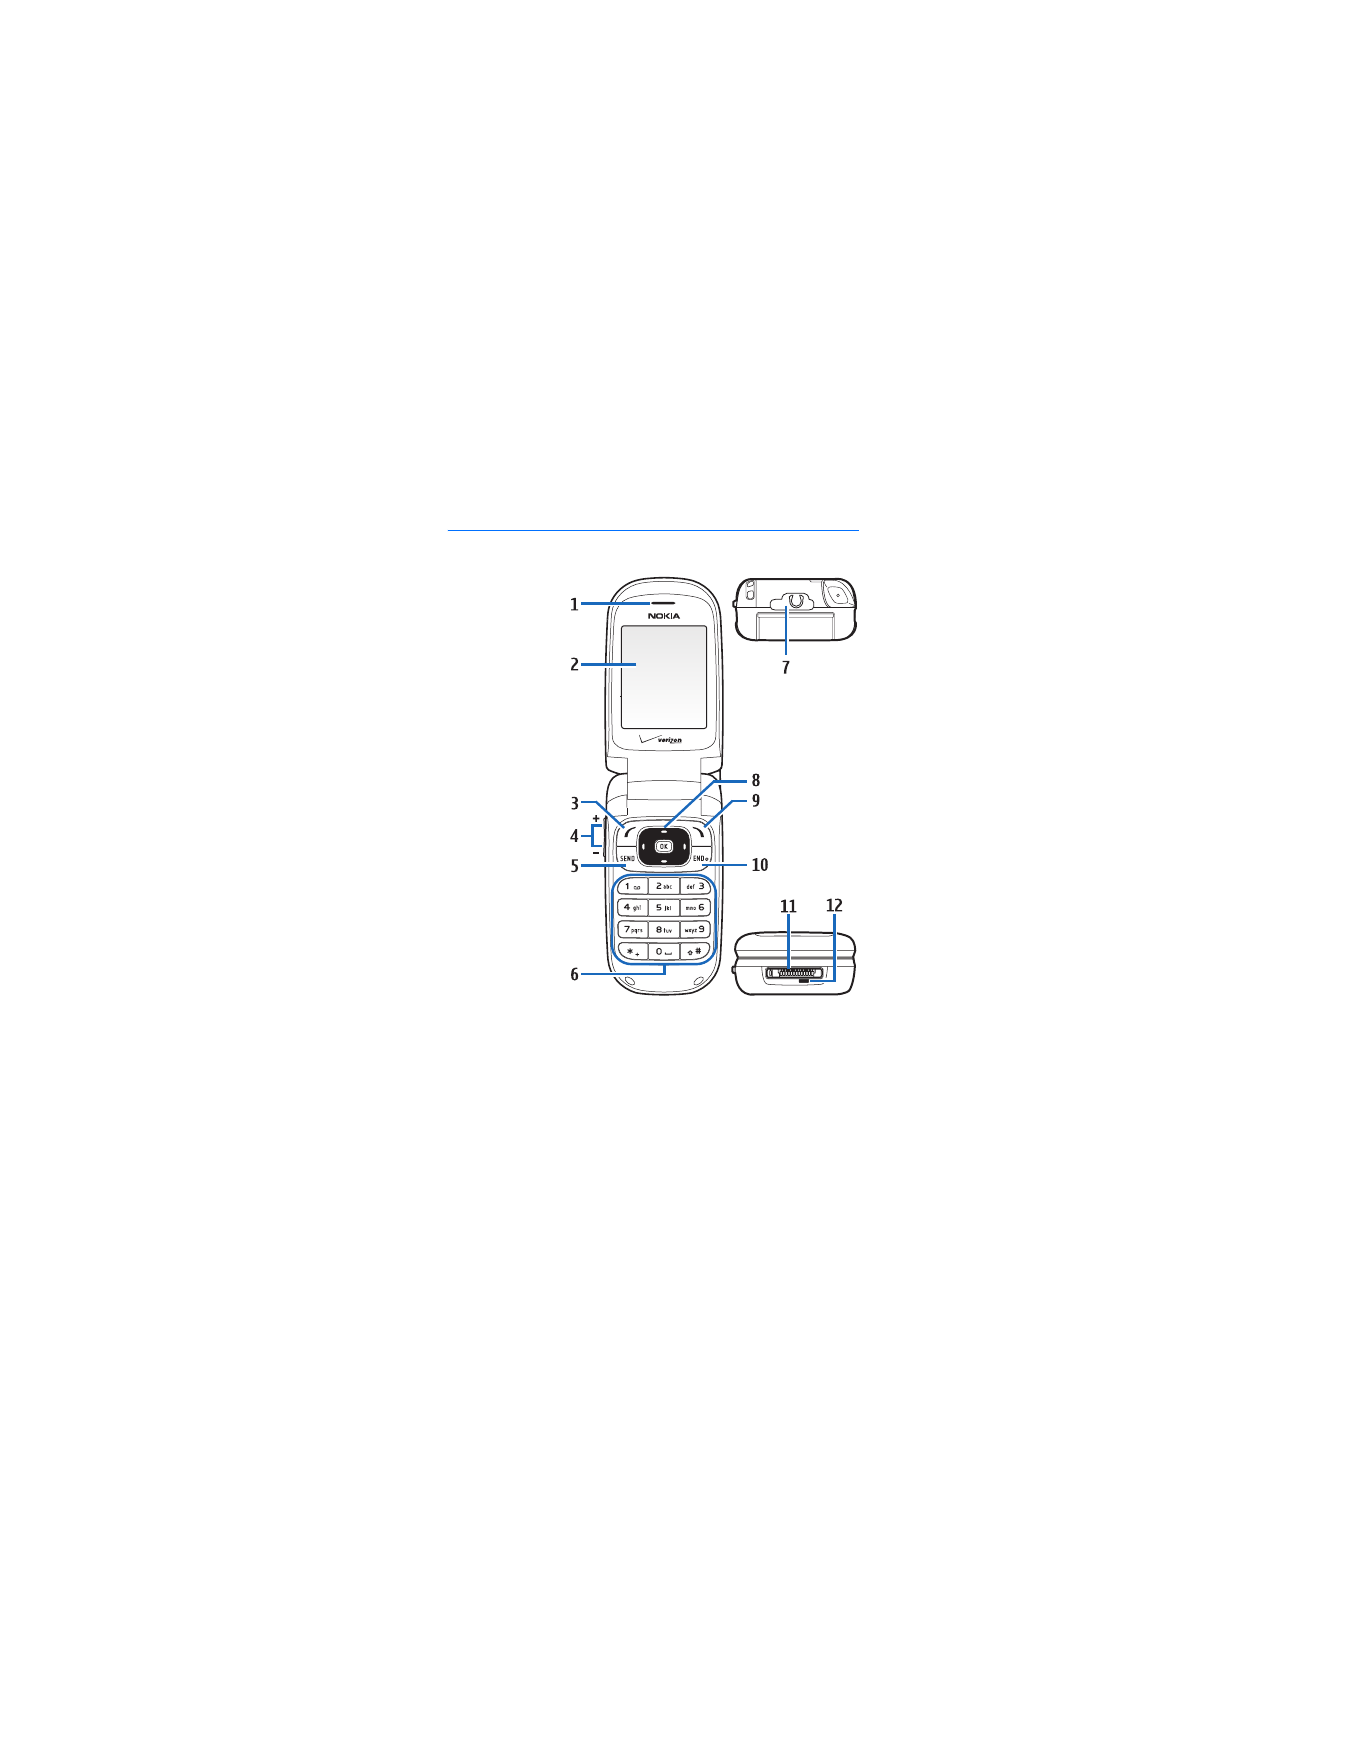
1. Phone at a glance
• Earpiece (1)
• Main
display
screen (2)
• Left soft
key (3)
• Volume
key (4)
• Send key (5)
• Keypad (6)
• Headset
connector
(7)
• Four-way
scroll and
center soft
key; and
Navigation
keys (8)
• Right soft key (9)
• Power and end key (10)
• Pop-Port™ charger (11)
• Microphone (12)
P h o n e a t a g l a n c e
11
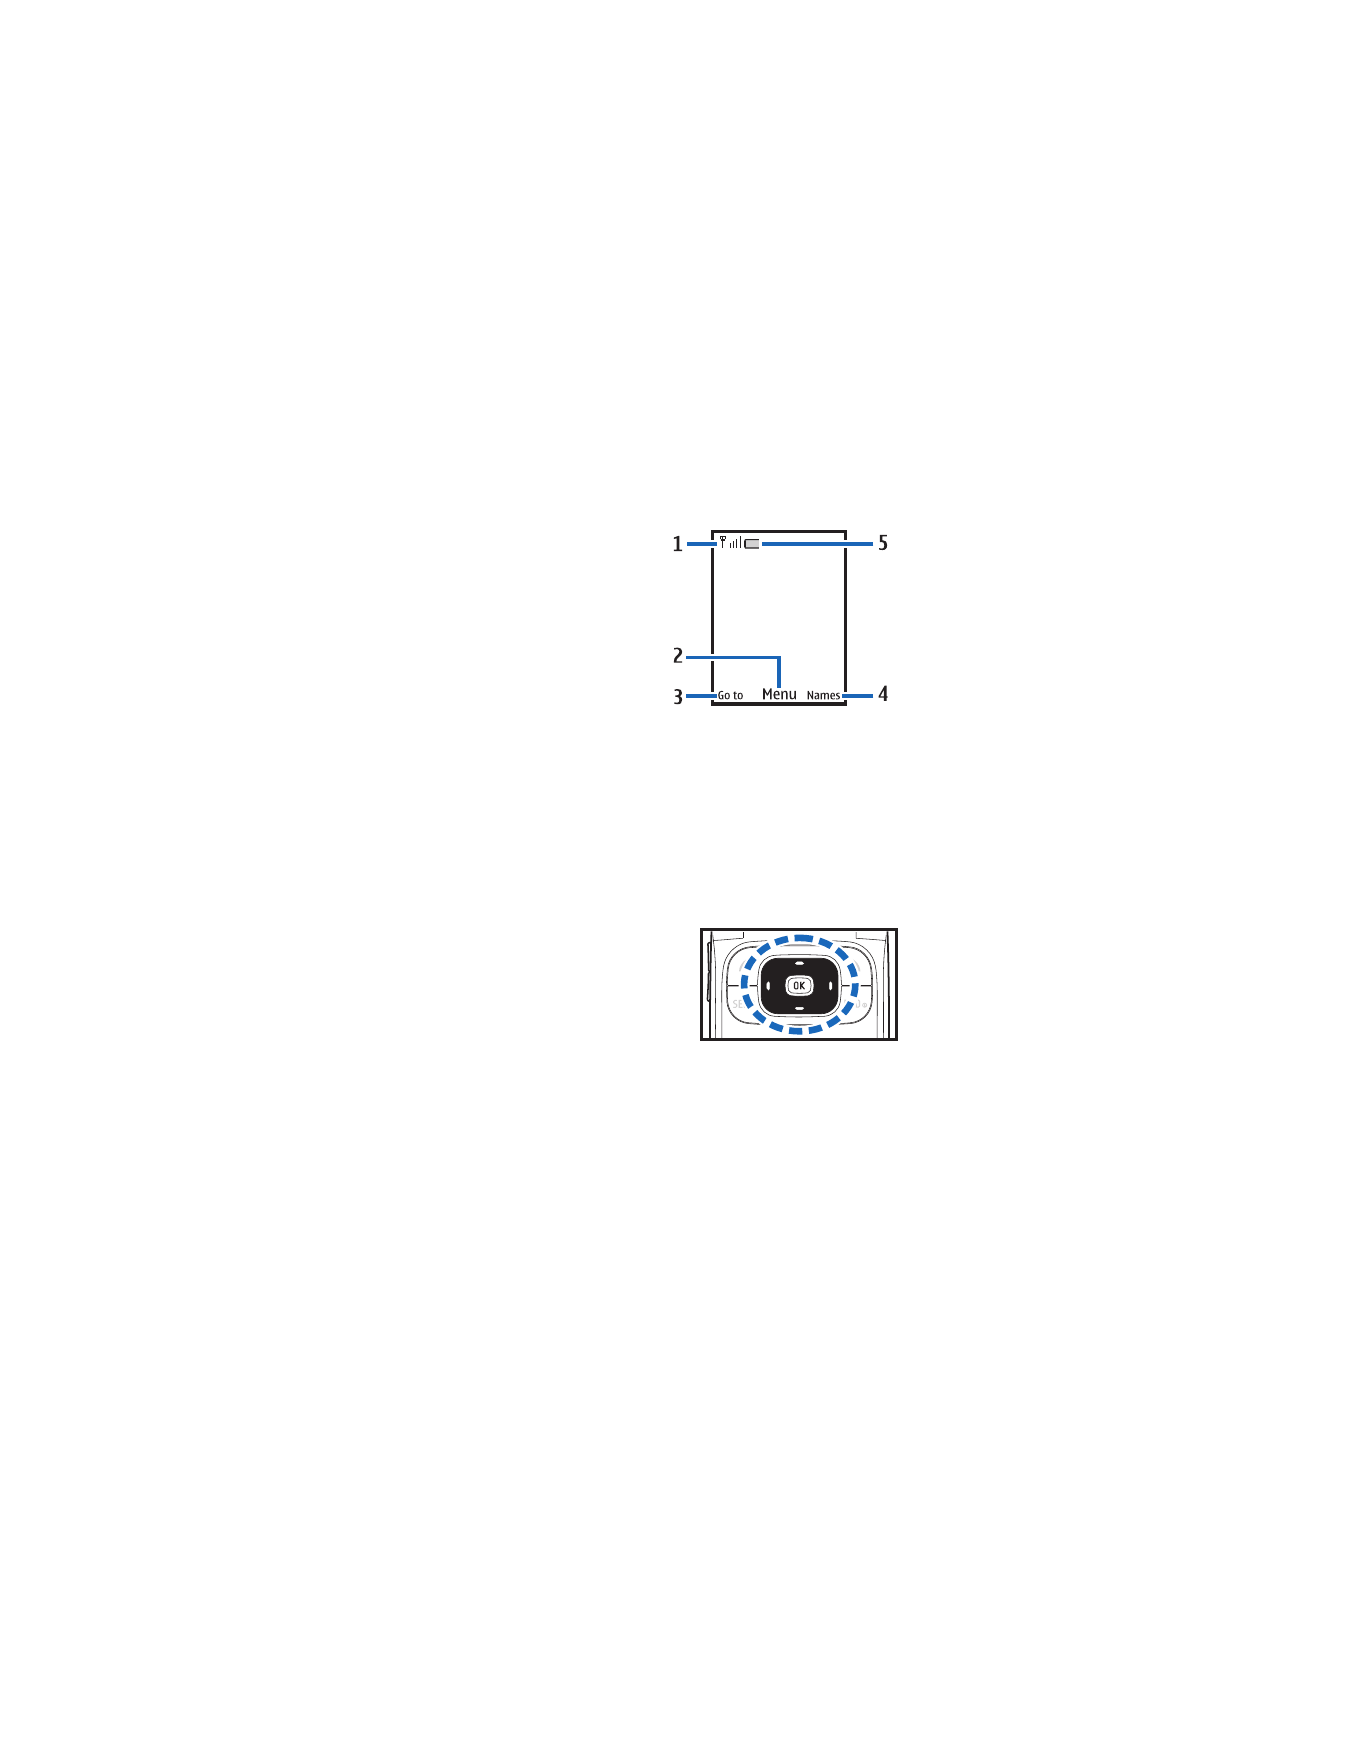
■ Standby mode
The following soft
keys appear in the
standby mode.
The standby mode
is home base and
indicates your phone is
in the idle state.
Signal strength (1)—
More bars indicate a
stronger network signal.
Menu
(2)—Press the center of the scroll key to select this option.
Go to
(3)—Press the left soft key to select this option.
Names
(4)—Press the right soft key to select this option.
Battery level (5)—A solid green symbol indicates a fully-charged
battery. The green color appears smaller as the battery is used.
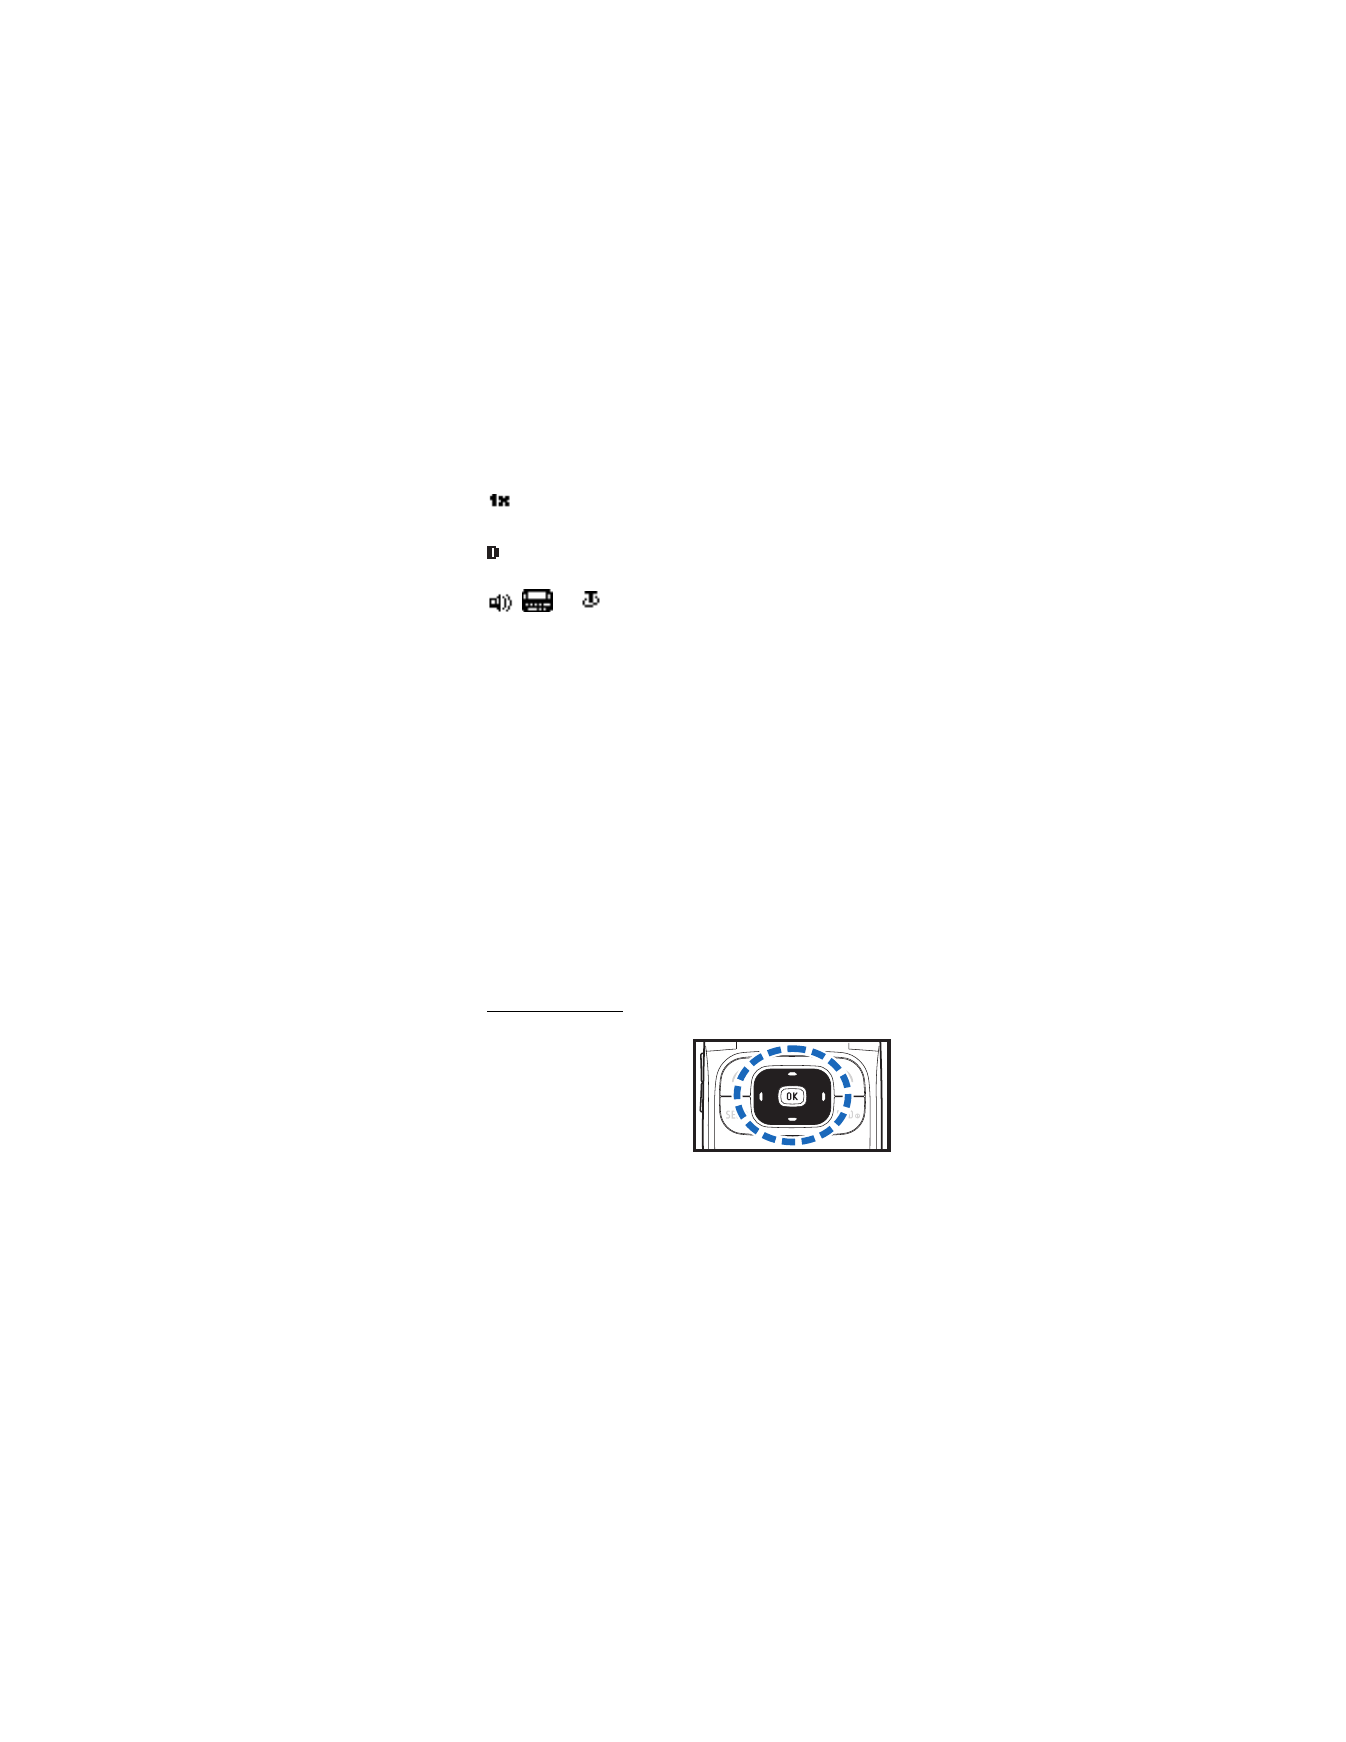
■ Navigation key shortcuts
The following
Navigation
key
shortcuts appear in the
standby mode. In the standby
mode, the
Navigation key
or
scroll key instantly takes you
to frequently-accessed menus:
Scroll up to view the calculator.
Scroll down to view the calendar.
Scroll right to view the tools menu.
Scroll left to view the settings menu.
Press the center of the scroll key to view the main menu
or a selected submenu.
To change the shortcuts to different menus, select
Menu
>
Settings
>
Phone
>
Navigation key
. See "Navigation key," p. 40.

P h o n e a t a g l a n c e
12
■ Indicators and icons
Some or all of the following indicators and icons may appear
in the standby mode.
To view the icons on your phone, select
Menu
>
Settings
>
Phone details
>
Icon glossary
.
The alarm clock is set to on. See "Alarm clock," p. 64.
Bluetooth connectivity is activated.
See "Bluetooth connectivity," p. 44.
Call status indicates an incoming call, a call in
progress, or a missed call. See "View missed calls,"
p. 26.
The countdown timer is running.
GPS is active and set to
Location on
.
See "Location info sharing," p. 36.
A headset is connected to the phone.
A hearing aid is connected. See "Hearing aid,"p. 48.
Your phone keypad is locked. See "Keyguard," p. 23.
You are roaming outside your home network.
See "Roaming options," p. 52.
Your phone is set to the silent profile. See "Profiles,"
p. 31.
The stopwatch timer is running in the background.
Enter text to add contacts, write text messages,
notes, or to-do lists.
You have a new text message. See "Text messages,"
p. 82.
The vibrating alert is activated.
You have new voice messages. See "Voice messages,"
p. 88.
P h o n e a t a g l a n c e
13
You are in a 1XRTT network.
See "Network services," p. 7.
You are in a digital network.
See "Network services," p. 7.
,
, or
An enhancement is connected to the
phone. See "Enhancement settings," p. 47.
■ Phone menus
Phone features are grouped according to function and are
accessed through the main menus. Each main menu contains
submenus and lists from which you can select or view items
and customize your phone features. To access these menus
and submenus, use the scroll method or a shortcut.
To change your menu view from list to grid, select
Menu
>
Options
>
Main menu view
>
List
or
Grid
.
Select
Menu
>
Options
>
Organize
to arrange the order of
the main menu icons. Use the scroll keys to move up, down,
left, or right, and select
Move
.
Some features may not be available, depending on your
network. For more information, contact your network operator.
Scroll method
Use the scroll key to scroll
up, down, left, and right
through the options.
1. In the standby mode,
select
Menu
, and
scroll through the
main menus.

P h o n e a t a g l a n c e
14
As you scroll through the menus, the menu number appears
in the upper right corner of the display. Below the time
indicator is a scroll bar with a tab that moves up or down on
the right side of the display screen as you scroll through
the menus, providing a visual representation of your
current position in the menu structure.
2. When you arrive at a menu, press
OK
at the center of the
scroll key to select submenus.
3. To return to the previous menu, select
Back
(the right soft key).
To return to the standby mode from any menu or submenu,
press the end key.
In-phone help
Many features have brief descriptions (help text) you can
view on the display. To view these descriptions, you must
first activate help text as follows.
Select
Menu
>
Settings
>
Phone
>
Help text activation
>
On
or
Off
.
Scroll to a feature, and wait about 14 seconds. Scroll down
to view all of the description, or select
Back
to exit.
■ Lock code
Your device has a security option allowing you to lock your
phone with a code. When the code is set and turned on, no
outgoing calls are allowed, and the menu cannot be accessed
without entering the correct code first. This prevents
unauthorized outgoing calls or access to any information
stored on your device.
The
Security
option is in the
Settings
menu. When you access
the Security option, you must enter a lock code. The preset lock
code is the last four digits of your phone number. If this does not
work, contact Verizon Wireless Customer Service for help.

P h o n e a t a g l a n c e
15
You must enter the lock code to access the following
Security
option:
1. In the standby mode, select
Menu
>
Settings
>
Security
.
2. Enter the lock code, and select
OK
. See "Change lock
code," p. 50.
■ Go to functions
The
Go to
menu enables you to change the function of the left
soft key on your phone. With this function, you can quickly
access your most frequently used functions from the
Go to
menu in the standby mode.
Choose Go to functions
1. In the standby mode, select
Go to
>
Options
>
Select options
.
2. Scroll up or down to the desired function.
3. Select
Mark
to add a function or
Unmark
to
remove a function.
4. Select
Done
when you have added all desired functions,
and
Yes
to save the changes.
Organize functions
1. Select
Go to
>
Options
>
Organize
. Scroll to the function
you want to move, and select
Move
.
2. Use the scroll keys to move the function up or down, and
select
OK
.
3. Select
Done
when you have moved all desired functions,
and
Yes
to save the changes.
S e t u p y o u r p h o n e
16